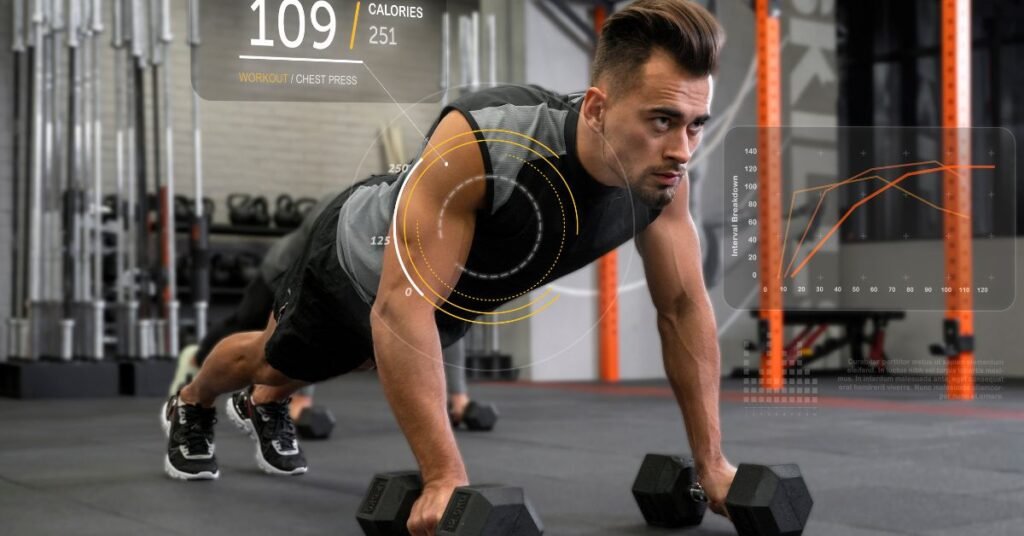


Over 15 million adults in the United States report severe joint pain every single year. Globally, musculoskeletal conditions are now the leading cause of disability, and the numbers keep climbing. What is alarming is that a large chunk of that pain is not the result of accidents or injuries. It quietly builds up from sitting too long, moving too little, and never addressing the muscle imbalances that slowly pull the body out of alignment.
Most people respond to knee pain or a stiff lower back by reaching for a pain reliever or a foam roller. Both offer temporary relief, but neither one fixes the actual problem. The real fix involves targeted movement that rebuilds strength, restores hip mobility, and retrains the body to hold itself properly.
The good news is that none of this requires a gym membership or expensive equipment. The five bodyweight exercises at home covered in this guide directly address the root causes of knee pain, tight hips, and bad posture. Each movement is practical, science-informed, and designed for real people with real schedules.
See this exercise in action. Click here to watch the full practical demo: Watch Now
Why Your Knees, Hips, and Posture Are All Connected?
Before jumping into the exercises, it helps to understand why these three problems tend to show up together.
The body works as a chain. The hips sit at the center of that chain, connecting the lower body to the upper body. When hip mobility is limited, often from hours of sitting every day, the surrounding muscles start to compensate. The glutes switch off. The hip flexors shorten. The pelvis tilts forward. That tilt puts extra load on the lower back and changes how the knees track during movement, which is where the pain begins.
At the same time, a forward-tilting pelvis pulls the upper spine out of alignment. The shoulders round forward. The head juts out. That is the classic bad posture picture that most people recognize in themselves but struggle to fix.
The reason it is hard to fix posture naturally without addressing the hips is that the upper body is just responding to what is happening below. Targeting the right hip mobility exercises, glute activation, and core stability at the same time is what actually corrects the pattern, not just stretching the shoulders and hoping for the best.
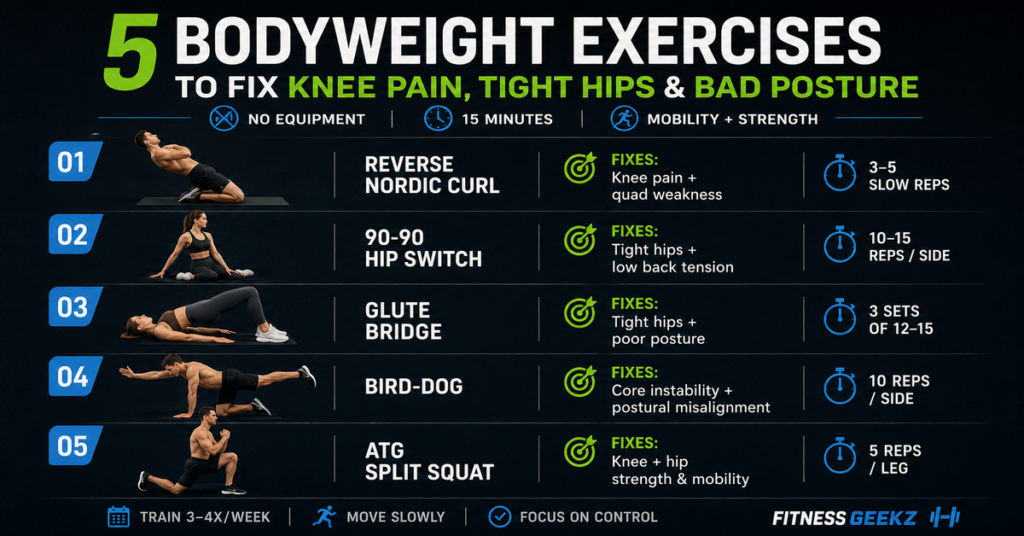
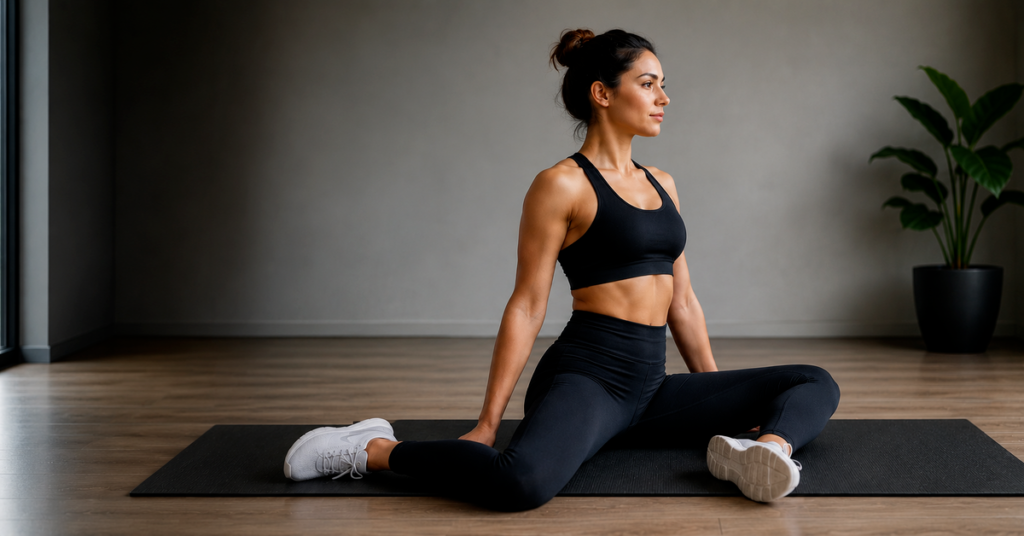
Exercise 1: Reverse Nordic Curl
What it fixes: Knee pain and quad weakness
Most exercises for knee pain relief focus on the muscles around the knee without actually loading the knee joint through its full range. The Reverse Nordic Curl does something different. It strengthens the quads in a lengthened position, which is exactly the position your legs are in when walking downstairs, running, or absorbing impact after a jump.
How to do it: Kneel on a comfortable surface with your body upright and hips pushed slightly forward. Slowly lean backward, keeping your body in a straight line from knees to shoulders. Go only as far as you can control, then use your quads to pull yourself back up. Start with 3 to 5 slow reps. It will feel challenging immediately, even with a small lean, and that is exactly the point.
Stick with this consistently and the difference in knee stability and strength over four to six weeks is noticeable, especially if going upstairs or squatting down has been uncomfortable.
Exercise 2: 90-90 Hip Switch
What it fixes: Hip stiffness and lower back tension
If there is one hip mobility exercise that covers the most ground in the shortest amount of time, this is it. Most people have reasonable forward hip mobility from walking, but almost no one trains hip internal rotation. That gap is what causes the hips to feel locked and the lower back to ache after long periods of sitting.
How to do it: Sit on the floor with one leg in front of you and one behind, both bent at 90 degrees. Sit up straight. Now slowly rotate your legs to the other side, switching positions in a controlled way. The key is keeping the upper body upright and not collapsing as you transition. Do 10 to 15 slow reps on each side.
If this feels stiff or difficult, that is a clear sign the hips need this work. Most people notice meaningful improvement in range and ease within two to three weeks of regular practice.
Exercise 3: Glute Bridge
What it fixes: Tight hips, lower back pain, and poor posture
Sitting all day essentially trains the glutes to do nothing. The hip flexors at the front of the hip end up doing most of the heavy lifting, which throws off posture and puts the lower back under constant stress. The Glute Bridge directly reverses this pattern.
How to do it: Lie on your back with knees bent and feet flat on the floor. Push through your heels, squeeze your glutes, and lift your hips until your body forms a straight line from shoulders to knees. Hold for a second at the top, then lower slowly. Do 3 sets of 12 to 15 reps. The squeeze at the top is where the real work happens, so do not rush through it.
This exercise also doubles as one of the most effective exercises for knee pain relief because strong glutes keep the knees tracking correctly during any weight-bearing movement.
Exercise 4: Bird-Dog
What it fixes: Core instability and postural misalignment
A weak core does not just affect the abs. It affects every joint in the body. When the deep stabilizing muscles of the spine are not doing their job, the surrounding muscles overwork, joints compress unevenly, and posture collapses under the weight of daily movement. The Bird-Dog trains those deep stabilizers without putting any load on the spine.
How to do it: Get on hands and knees with a flat back and neutral spine. Extend your right arm forward and your left leg straight back at the same time. Hold for two seconds, return to start, and switch sides. Do 3 sets of 10 reps per side. Keep the back completely flat throughout. The moment the lower back arches, the exercise stops working the way it should.
This is one of the best movements anyone can add to a no equipment workout routine if fixing bad posture naturally is the goal. It trains the body to stabilize the pelvis and spine simultaneously, which is the foundation of good posture.
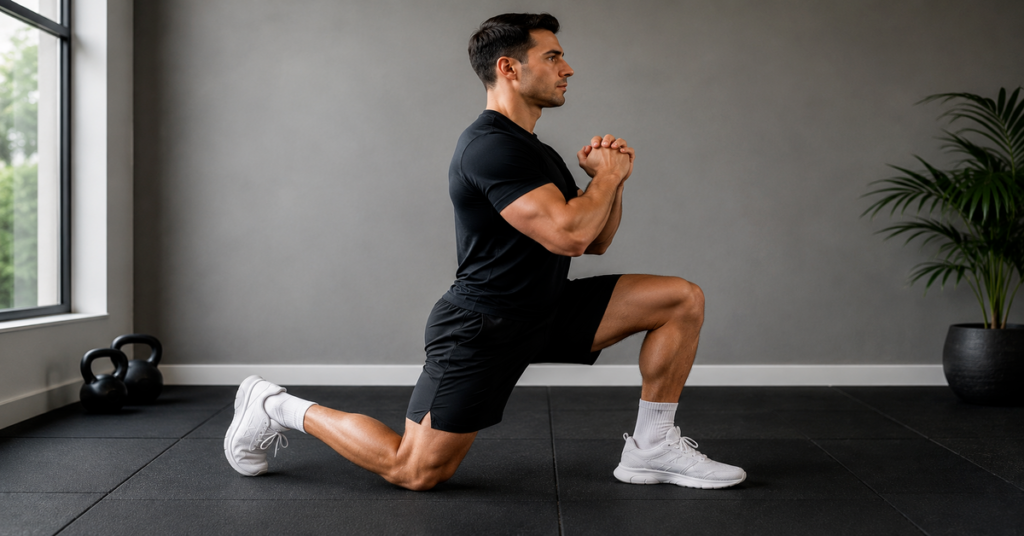
Exercise 5: ATG Split Squat
What it fixes: Knee pain, hip flexibility, and ankle mobility
This is the most complete lower body exercise in this routine. ATG stands for Ass to Grass, meaning the movement goes through full range of motion. It challenges the knee, hip, and ankle simultaneously in a way that most exercises simply do not reach, and it builds the kind of end-range strength that protects joints during real life movement.
How to do it: Start in a split stance with one foot forward and the opposite knee resting on the floor behind you. Slowly drive your front knee forward over your toes while lowering the back knee toward the floor. Keep your chest upright, your front heel planted, and your movement controlled. Pause briefly at the bottom, then press back up. Start with 5 reps per leg.
It may feel challenging at first, and that is normal. The areas this exercise targets tend to be undertrained in most people. Progress will come quickly if the movement is practiced consistently.
At a Glance: Which Exercise Fixes What
| Exercise | Primary Fix | Muscles Targeted | Reps / Duration | Difficulty |
| Reverse Nordic Curl | Knee pain relief | Quads, knee tendons | 3 to 5 reps | Intermediate |
| 90-90 Hip Switch | Hip mobility | Hip rotators, glutes | 10 to 15 per side | Beginner |
| Glute Bridge | Tight hips, posture | Glutes, hamstrings | 3 sets of 12 to 15 | Beginner |
| Bird-Dog | Bad posture, core | Erector spinae, glutes | 3 sets of 10 per side | Beginner |
| ATG Split Squat | Knee and hip strength | Quads, hip flexors, ankles | 5 per leg | Intermediate |
All five exercises are part of a no equipment workout. Nothing to buy, nothing to set up.
How to Put the Routine Together
Do all five exercises back to back in two rounds. The whole session takes about 15 to 20 minutes. Aim for three to four sessions per week. That frequency is enough to drive real change in joint health and posture without overdoing it.
A few things that make the difference between results and frustration:
- Focus on form over speed. Controlled, slow reps build more strength and joint stability than rushing through sets.
- Breathe steadily throughout each movement. Holding your breath during effort is a common habit that increases tension and reduces output.
- If a full range of motion feels impossible at first, reduce the depth rather than the frequency. Showing up consistently with a reduced range builds toward full range over time.
- Do not skip the 90-90 Hip Switch just because it does not feel like a workout. Hip mobility work is the quiet driver of everything else in this routine.
Mistakes That Slow Progress
A few patterns consistently get in the way of people seeing results with a routine like this.
Rushing the reps is the most common one. These exercises are not cardio. The value comes from slow, deliberate movement that trains the nervous system to control the joints, not just the muscles to contract.
Only training when pain is present is another issue. Pain relief exercises for knee pain and hip stiffness work best as prevention, not just treatment. The goal is to address the root cause before flare-ups happen, not after.
And skipping exercises that feel easy at the start, like the 90-90 Hip Switch or the Glute Bridge, is a mistake. Those movements feel easy precisely because the muscles driving them are underdeveloped. That ease disappears quickly once the work gets intentional.
Conclusion
Knee pain, tight hips, and bad posture rarely appear out of nowhere. They develop slowly, over months and years of repetitive sitting, weak stabilizers, and limited movement. The encouraging part is that the body responds quickly when given the right stimulus.
These five bodyweight exercises at home are not a temporary fix. They are a structured, sustainable approach to rebuilding the strength and mobility that daily life quietly chips away at. Start with two rounds, stay consistent four times a week, and the difference in how the joints feel will become obvious within a few weeks.
For more home training guides built around real movement science, explore the full library at Fitness Geekz.
Frequently Asked Questions
Three to four times per week is the sweet spot for most people. Consistency matters far more than intensity at this stage. Even 15 to 20 minutes per session produces measurable improvements in joint comfort and mobility within four to six weeks of regular practice.
Absolutely. Tight hip flexors tilt the pelvis forward, which forces the lower back into an excessive arch and pushes the upper back into a rounded position. Restoring hip mobility directly corrects that chain reaction, making it one of the most effective ways to fix bad posture naturally without any equipment.
These movements are low-impact and widely used in physical therapy and rehabilitation settings. That said, anyone with a diagnosed knee condition should check with a physiotherapist before starting. Beginners with existing discomfort should reduce the range of motion and build up gradually rather than pushing through sharp pain.
The 90-90 Hip Switch targets both internal and external hip rotation, making it the most direct option. Pairing it with Glute Bridges creates a well-rounded routine that addresses the full hip complex, including the hip flexors, rotators, and glute muscles that tend to weaken and tighten together.
Most people notice reduced tension and improved body awareness within two to three weeks. More significant postural changes typically take six to twelve weeks of consistent training, depending on how long the pattern has been present and how regularly the routine is followed. Pairing this kind of mobility and stability work with the right approach to build muscle faster can accelerate the overall physical transformation significantly.